A kitchen built for one-handed cooking rests on three changes: a work surface no higher than 34 inches with open knee space below it, per the ADA standards for accessible work surfaces (matching ANSI A117.1); tools that anchor themselves to the counter; and storage kept between your hips and shoulders so nothing requires a two-handed catch. None of it requires a full renovation.
Spedtacular Daily Living publishes information, not medical advice. If your one-handed technique follows a stroke, surgery, or injury, an occupational therapist can tailor this setup to your recovery — the layout below follows the standards and manufacturer documentation for the equipment described.
Why an ordinary kitchen fights a one-handed cook?
Standard kitchens assume two working hands. Counters sit at 36 inches — two inches above the ADA maximum height for an accessible work surface — and base cabinets block your knees, so you end up doing prep work sideways or standing in an unstable stance. Round jars roll when you hold them, mixing bowls slide when you whisk, and cabinet shelves put ingredients at heights where dropping is the likely outcome.
The fix is not strength or practice. It is physics: give yourself a surface you can brace against, tools that stay put, and objects positioned where one hand can control them. That is the same logic behind the ADA's 30-by-48-inch clear floor space at kitchen elements — space to work from a stable position instead of reaching across one.
What counter height and knee clearance do you need?
The ADA standards cap an accessible work surface at 34 inches above the floor, with knee clearance at least 27 inches high, 30 inches wide, and 19 inches deep underneath for a forward approach. Those numbers come from the U.S. Access Board's ADA standards, which mirror the ANSI A117.1 standard used in many local building codes — though which applies to your home depends on your building type, program, and jurisdiction.
In practice you have three routes. A contractor can lower one run of base cabinets and shorten the doors. A roll-under table — many adjustable-height models sold as standing desks or craft tables meet the 34-inch cap — can live beside the refrigerator as a prep station. Or a single pull-out board installed between two base cabinets gives you a work surface you can slide out only when needed. Any of the three satisfies the same principle: knees under the counter, elbows at working height, food within a forearm's reach.
Which tools stay put while you work?
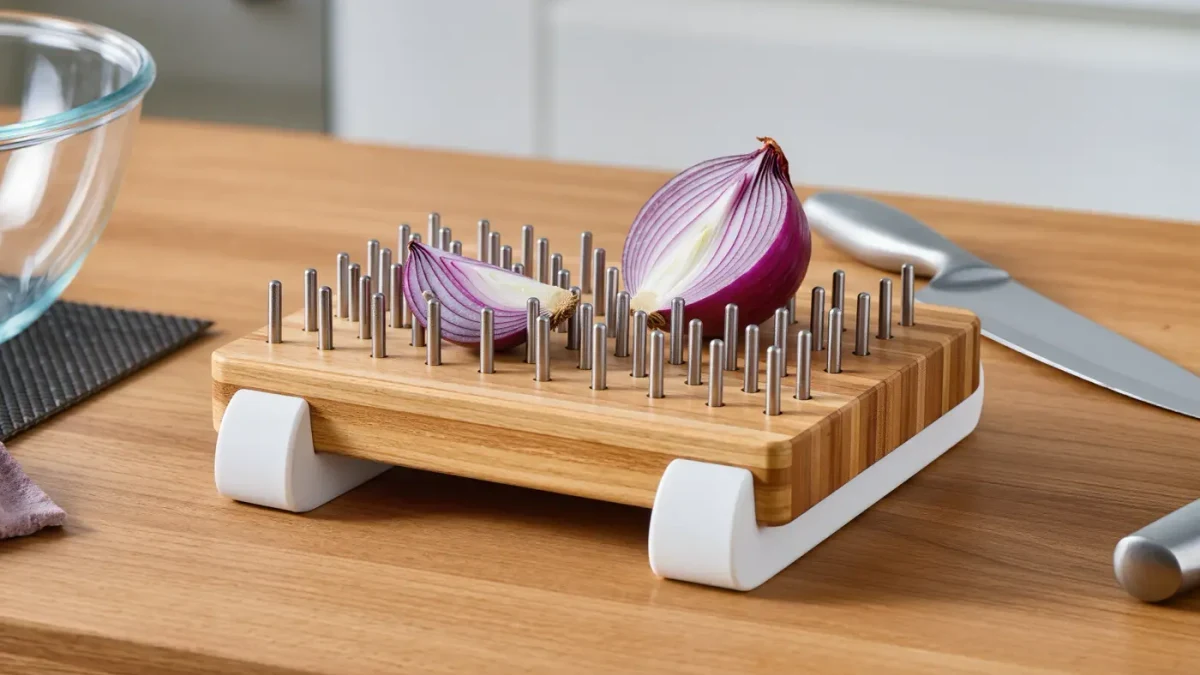
The single most useful category is anything with a clamp or suction base. Per manufacturer documentation for the major adaptive-kitchen brands, the common options include cutting boards with suction feet and integral food spikes, bench-mounted jar openers that grip the lid while you turn the jar, and clamp-on vegetable holders. A spiked board alone replaces the hand that used to hold an onion still.
Beyond clamps, look for geometry that trades a second hand for leverage:
- Rocker knives cut with a downward press instead of a sawing motion that needs a fork pinning the food.
- One-touch can openers mount to the can and turn themselves, per manufacturer documentation.
- Non-slip matting (the shelf liner sold everywhere) under any bowl turns your counter into the second hand.
- Pots with two handles opposite each other can tip and pour against a sink edge.
- A wall-mounted magnetic strip holds knives where you reach them, not in a block that needs two hands to safe-use.
Buy the clamp-on board and matting first — both are inexpensive, and they cover the majority of prep tasks. Add specialized tools as a specific recipe demands them, not before.
How do you reorganize storage for one hand?
Work in zones, and put the daily items between hip and shoulder height. The National Institute of Neurological Disorders and Stroke, in its patient guidance on stroke recovery, stresses practicing daily tasks in the environment where they happen — which means your storage should match how you actually reach, not how a showroom looks.
- Empty one cabinet at a time and sort by frequency of use, not by category.
- Place daily dishes and the tools above at waist height; seasonal items go high or low.
- Replace shelf stacks with shallow bins you can pull out with one grip and lower onto the counter.
- Swap twist jars for flip-top or squeeze containers where the contents allow.
- Hang the most-used utensils on a wall strip or a rod with S-hooks inside the prep zone.
A lazy Susan in the corner cabinet and door racks for spices cut the reaches that require stabilization with a second hand. Give yourself a landing spot — one always-clear stretch of counter next to the stove and another next to the sink — so you can set things down mid-task without planning ahead.
What keeps cooking safe with one hand?
Heat is the main risk when you cannot slide a pan with two grips. Push pans across the stove rather than lifting; keep pot handles turned inward but not over a neighboring burner; and use the back burners when the front ones are free. A stove guard or elevated front lip, sold by adaptive-equipment makers, keeps pots from sliding off the edge while you stir.
Small habits do the rest. Chop everything before any burner turns on. Carry plates on a small tray that slides along the counter rather than through the air. Keep a fire extinguisher and a tight-fitting lid within reach of your working side — not behind the stove, where a flare-up blocks the path.
What does a working setup look like start to finish?
Here is the order that costs least and pays back fastest, based on the standards above and manufacturer documentation for the equipment.
| Change | What it gives you | Basis |
|---|---|---|
| Non-slip matting plus suction cutting board | Stable prep without a holding hand | Manufacturer documentation, adaptive kitchen brands |
| 34-inch roll-under prep station | Braced, seated-or-standing workspace | ADA / ANSI A117.1 dimensions |
| Wall strip for knives and utensils | One-grip tool access in the prep zone | Manufacturer documentation |
| Bin-based cabinet reorganization | Pull-and-lower storage at waist height | NINDS stroke-recovery guidance on task practice |
| Stove guard and handle habits | Heat control without a second grip | Manufacturer documentation; fire-safety practice |
Requirements and code applicability vary by jurisdiction and building type — the ADA standards bind public accommodations and, through ADA Title II, state and local government facilities, while your own kitchen follows local code and your own choices. The dimensions are simply what has proven workable.
Start with the matting, the board, and one cleared counter at the right height. Cook three familiar meals before buying anything else, and let those meals write your shopping list. Most one-handed kitchens end up with fewer tools than the two-handed kitchen they replaced — just the ones that hold still.